


")
")
")
")


?")


With Free Utility KingoRoot you can easily root your device
Rooting is what could be compared to jailbreaking, a way to unlock the operating system to install the applications that are not approved, removed unwanted bloatware, refresh the OS, supplant the firmware, overclock (or underclock) the processor, customizing the device as you like and etc.
Obviously, for the normal user, this sounds like – and can be – an unnerving procedure. All things considered, “rooting” around in your device’s center software may appear to be a move for a debacle. One wrong move and you could finish up with bricked handset.
Fortunately, there’s a utility that allows rooting to be a single click process: KingoRoot. It’s free and it works – however not with all android phones.
I initially tried Kingo on a Virgin Mobile Supreme and Asus Nexus 7; the procedure demonstrated snappy and simple. All the more as of late, I also used it to root a OnePlus One, and this time it was easier than before – in light of the fact that an application did practically everything.
In any case, I couldn’t get the utility to deal with a Verizon Samsung Galaxy S6. Your mileage may shift, obviously, and I certainly prescribe checking the compatibility list before continuing. (Regardless of whether your device isn’t on it, the utility may work with it.)
To learn about ‘Jailbreak’ and ‘Unlock’ go to iPhonehub.
Here’s how to begin.
The Application version
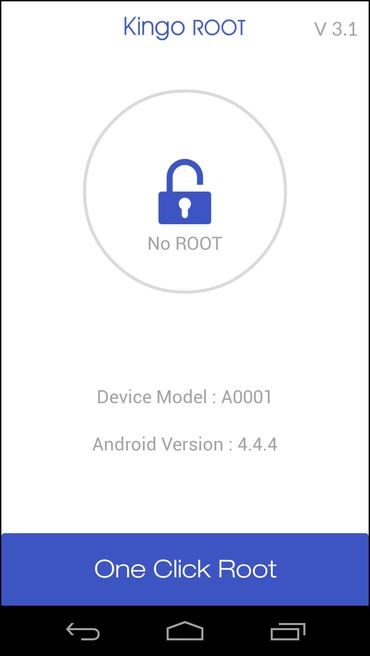
The most straightforward approach to utilize KingoRoot is to install the version of the application, which actually plays out the root procedure with only one tap.
Truth be told, the main convoluted part is really getting that application onto your device. Because that is not accessible in the Google Play Store; rather, you should download the KingoRoot APK and install it manually.
Screenshot
Ideally, you’ll simply indicate your device’s mobile to the KingoRoot Android page and download it specifically. In the event that doesn’t work for any reason, or you’re working from your PC, download the APK and email it to yourself. At that point, on your handset, open that email and download that connection.
Before installing it, however, you’ll have to ensure your device is set to install applications from unknown sources. In many variants of Android, that goes this way: Go to Settings, tap Security, look down to Unknown Sources and flip the change to the on position.
Now you’ll be able to install KingoRoot. At that point run the application, tap One Click Root, and cross your fingers. In most cases it goes well, your phone ought to be rooted in around 60 seconds.
Desktop Version
Here’s the process
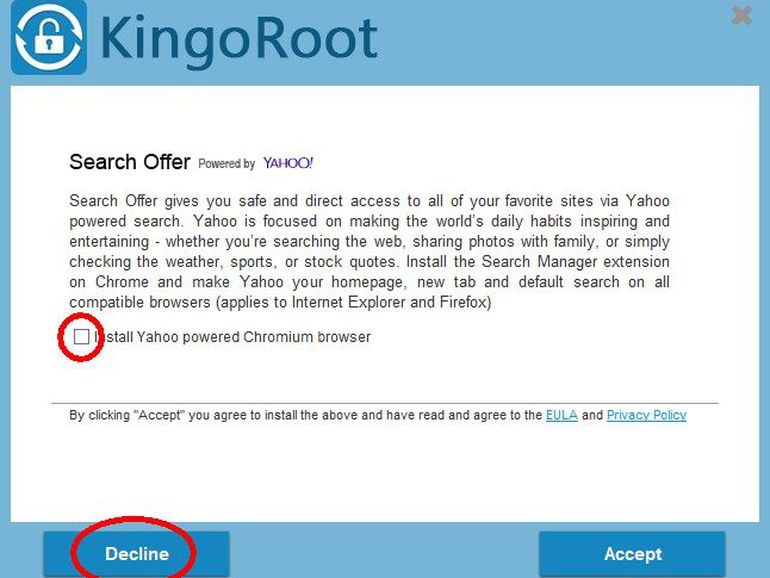
1: Download and install the KingoRoot application for Windows, making a point to leave unchecked the choice to “Install Yahoo fueled Chromium program” because you don’t need it and afterward click Decline to keep some other adware invasions.
2: You must enable USB debugging mode on your device. If your device is running Android 4.0 or 4.1, tap Settings, Developer Options, tick the crate for “USB debugging.” (You may need to switch “Developer options” to On before you can do as such.) On Android 4.2, tap Settings, About Phone, Developer Options, and afterward tick USB debugging.” Then tap OK to favor the setting change.
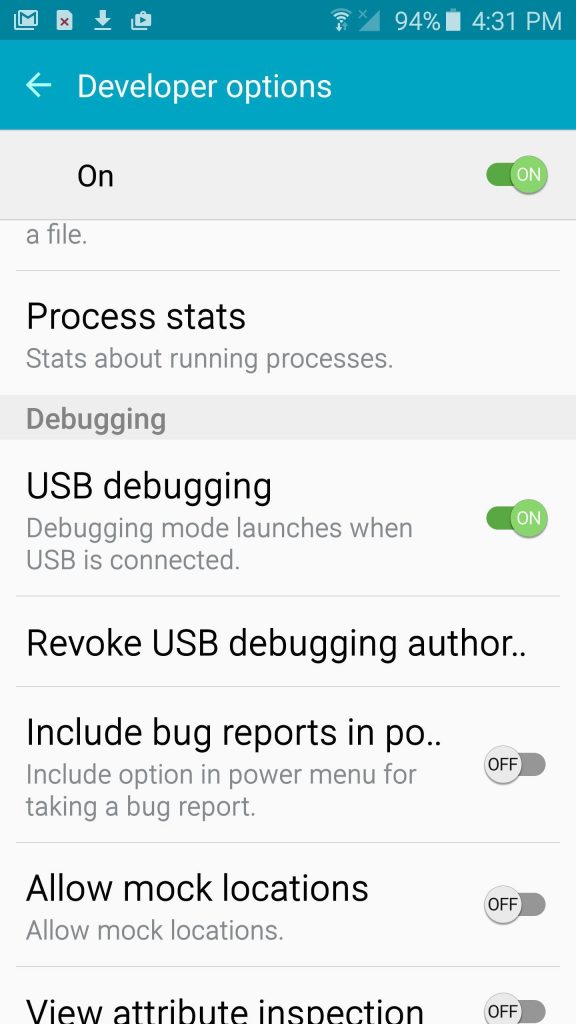
On Android 4.3 and later (counting 5.0, however, this likewise applies to a few versions of 4.2), tap Settings, About Phone, at that point look down to Build Number. Tap it 7 times, so, all in all, you should see the message, “You are now a developer!”
With that done, tap Settings, About Phone, Developer Options, and after that tick USB debugging. Then tap OK to affirm the setting change.
3: Run Android Root on your PC, at that point connect your smartphone by means of its USB synchronize cable. After a minute, the PC or laptop will show a connection with the latter. An “Allow USB debugging?” pop-up will appear on the screen. Tick “Always allow from this PC,” at that point tap OK.
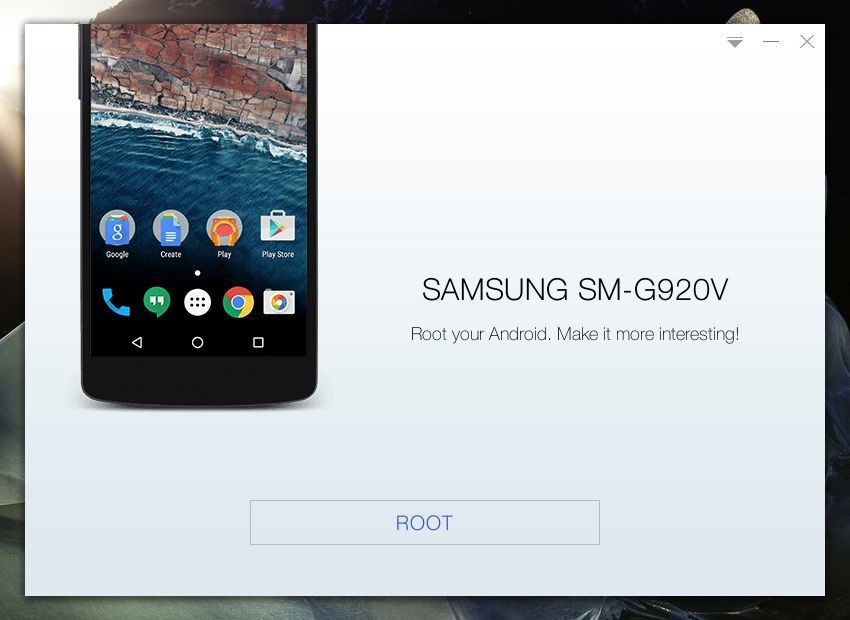
4: Now click Root, then sit back and relax while the utility does its thing. After the rooting process is done successfully your device’s battery will go down a little.
What’s more, it’s just as simple as that. On the off chance that you choose to turn around the procedure, simply run Android Root once more, connect your handset, now click Remove Root. (Same goes for the application version, pretty much.) To jailbreak your iPhone 8 and enjoy customizing it in your way go to Jailbreak iPhone 8.


")